Hi,Welcome to our blog,I this tutorial let's See how to disable lock screen in Windows 10.
What is Lock Screen ??
Lock Screen is an Picture displayed While We lock our PC. It Will be Displayed While We
Press Windows + L Key, & Also While We boot into Computer.though it Would be nice
Have some picture to set as lock screen,Some of the Users doesn't like it. So in this tutorial
lets See how to disable lock Screen in Windows 10.
How to disable ??
If You wish to disable lock Screen then just follow the Upcoming Steps in Your Windows 10
PC.
Step 1 : Login to Your Windows PC As Admin.
Step 2 : Press Windows +R Key Simultaneously.
It Will Popup the run Command.On it type gpedit.msc
Step 3 : Hit Enter.
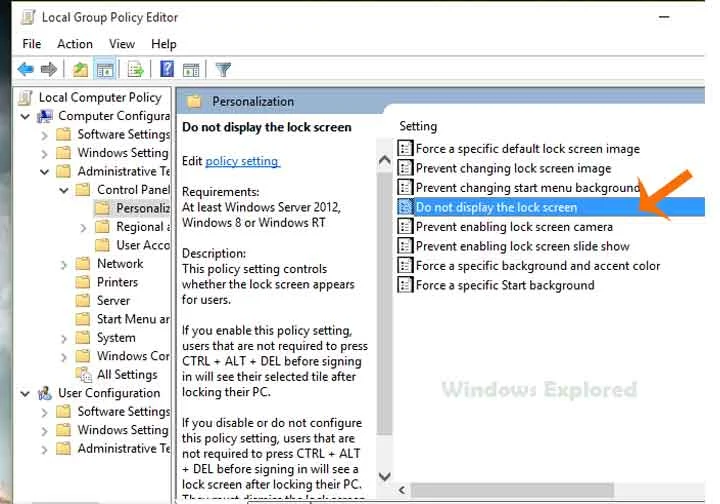
Step 4 : It will Open a new Window,Which is Local Group Policy Editor.
Step 5 : On that Navigate as Follows.
Computer Configuration->Administrative templates->Control
Panel->Personalization.
Step 6 : You May Find an Option, "Do not display Lock Screen ",on
the right Pane.
Step 7 : Click on it.
Step 8 : It Will Open A New Window, on that Select Enabled.
Step 9 : Select/tap Apply.
Step 10 : Click on OK.
Note : If You Wish to Enable it in feature Simply follow the Above Steps, and While in Step
8 Click on Not Configured Option.
That's it...
Other Articles :
And More...

